
Getting around the new version
The new version gives you two ways to work, so you can pick what fits the moment and switch anytime:
- Classic layout is clean and uncluttered, just you and your drawing, made for animating quickly and simply.
- Studio layout opens everything up: the full timeline, all your layers and audio in one place, and a lot more control over editing and arranging your animation. Here's a quick tour of both, and what each part is called.
Classic layout
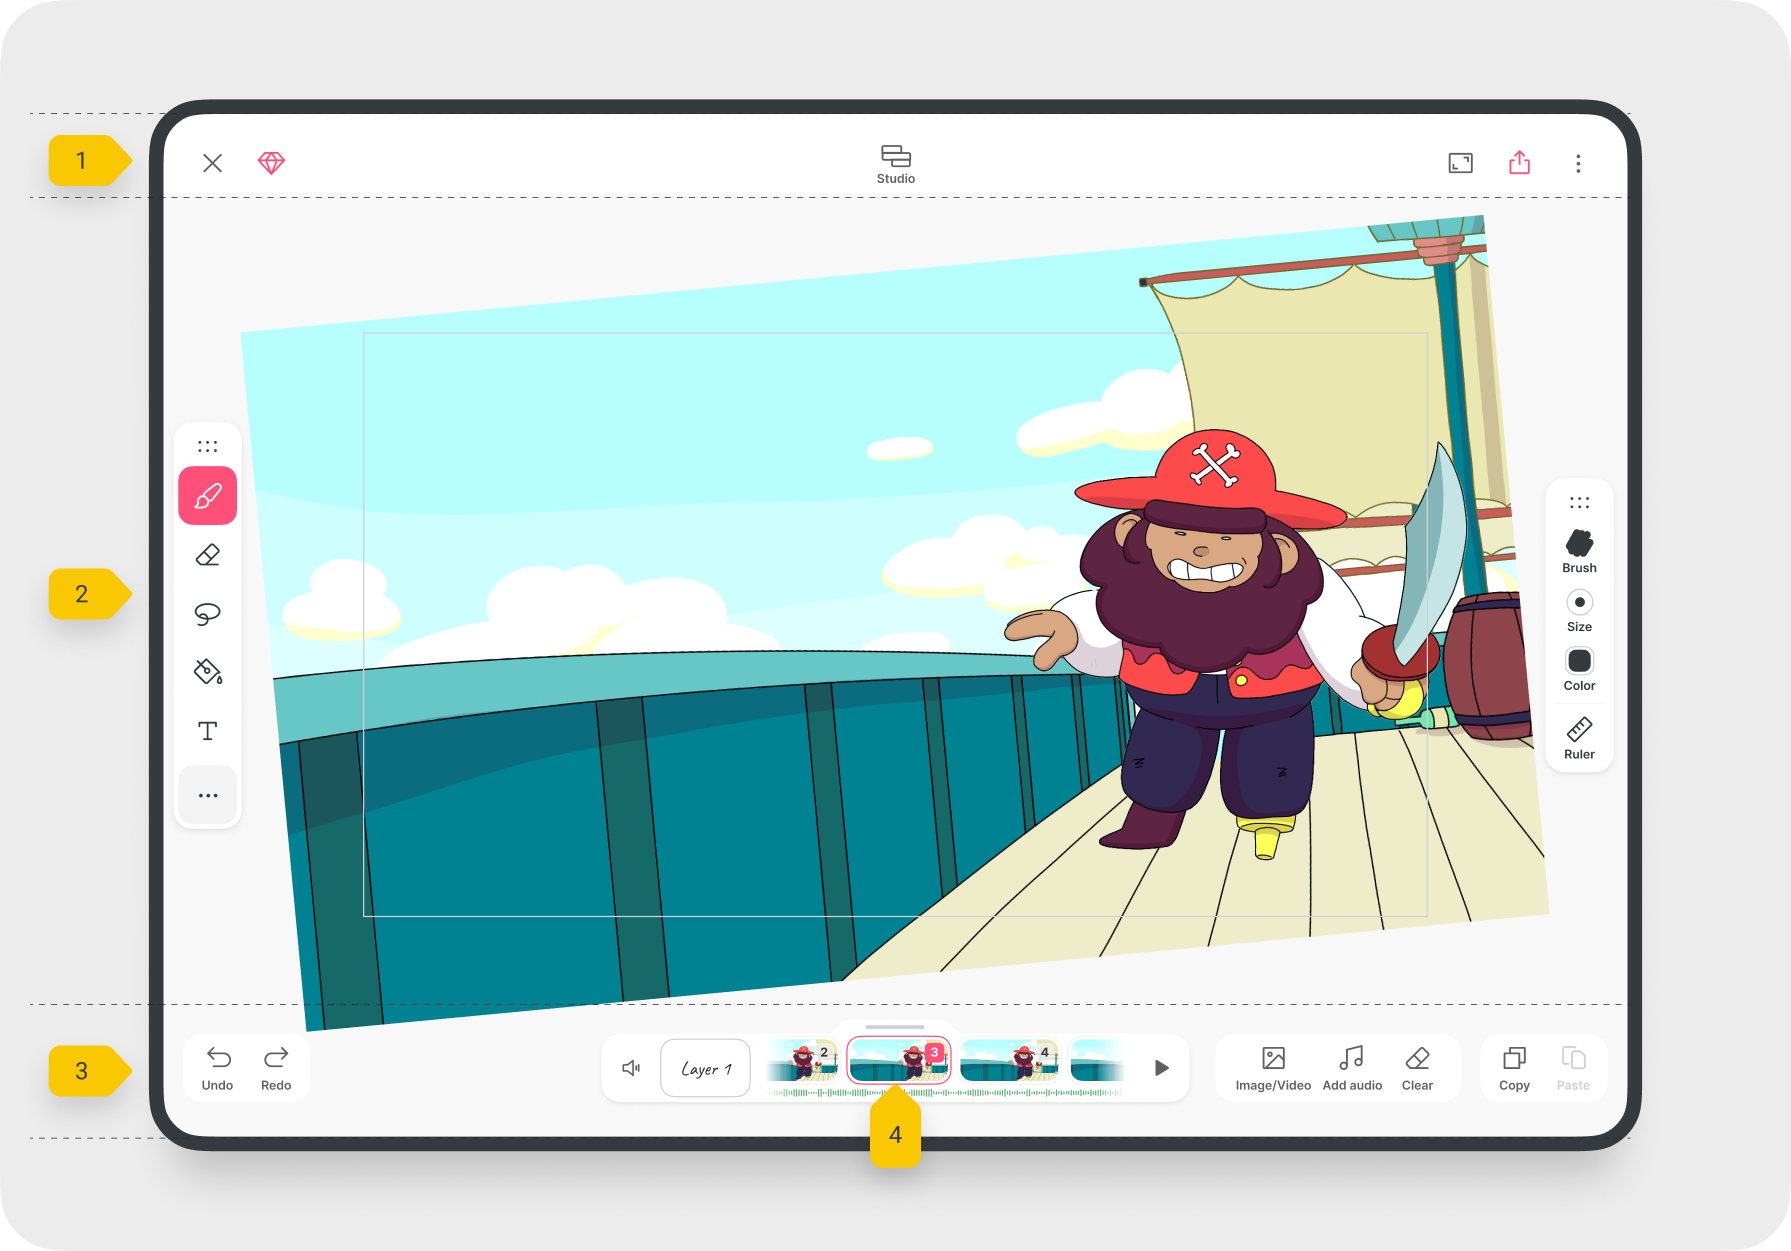
- Navigation bar, the top row: leave the project, switch layouts, fit your drawing to the screen, share, and open the project menu (take a quick tour, project settings, onion skin, grid, magic cut, and make movie).
- Stage, where you draw. It holds the surface (your full workspace, draw anywhere on it), the canvas (the framed area that ends up in your final video, so anything outside it stays out of the export), and your drawing tools and their options, which float on top so you can move them around. The stage works exactly the same in Classic and Studio.
- Context menu, the action bar along the bottom while you're drawing: undo, redo, copy, paste, import an image or video, add audio, and clear the frame. Adding audio brings the timeline up into Studio so you can see where the clip lands, since Classic doesn't show audio tracks on its own.
- Mini timeline, the slim frame strip at the bottom. Scrub through your frames, tap the layer thumbnail to see and manage your layers, and add frames. Drag the Mini timeline up to move into Studio. A mute control appears here when your project has audio.
Studio layout
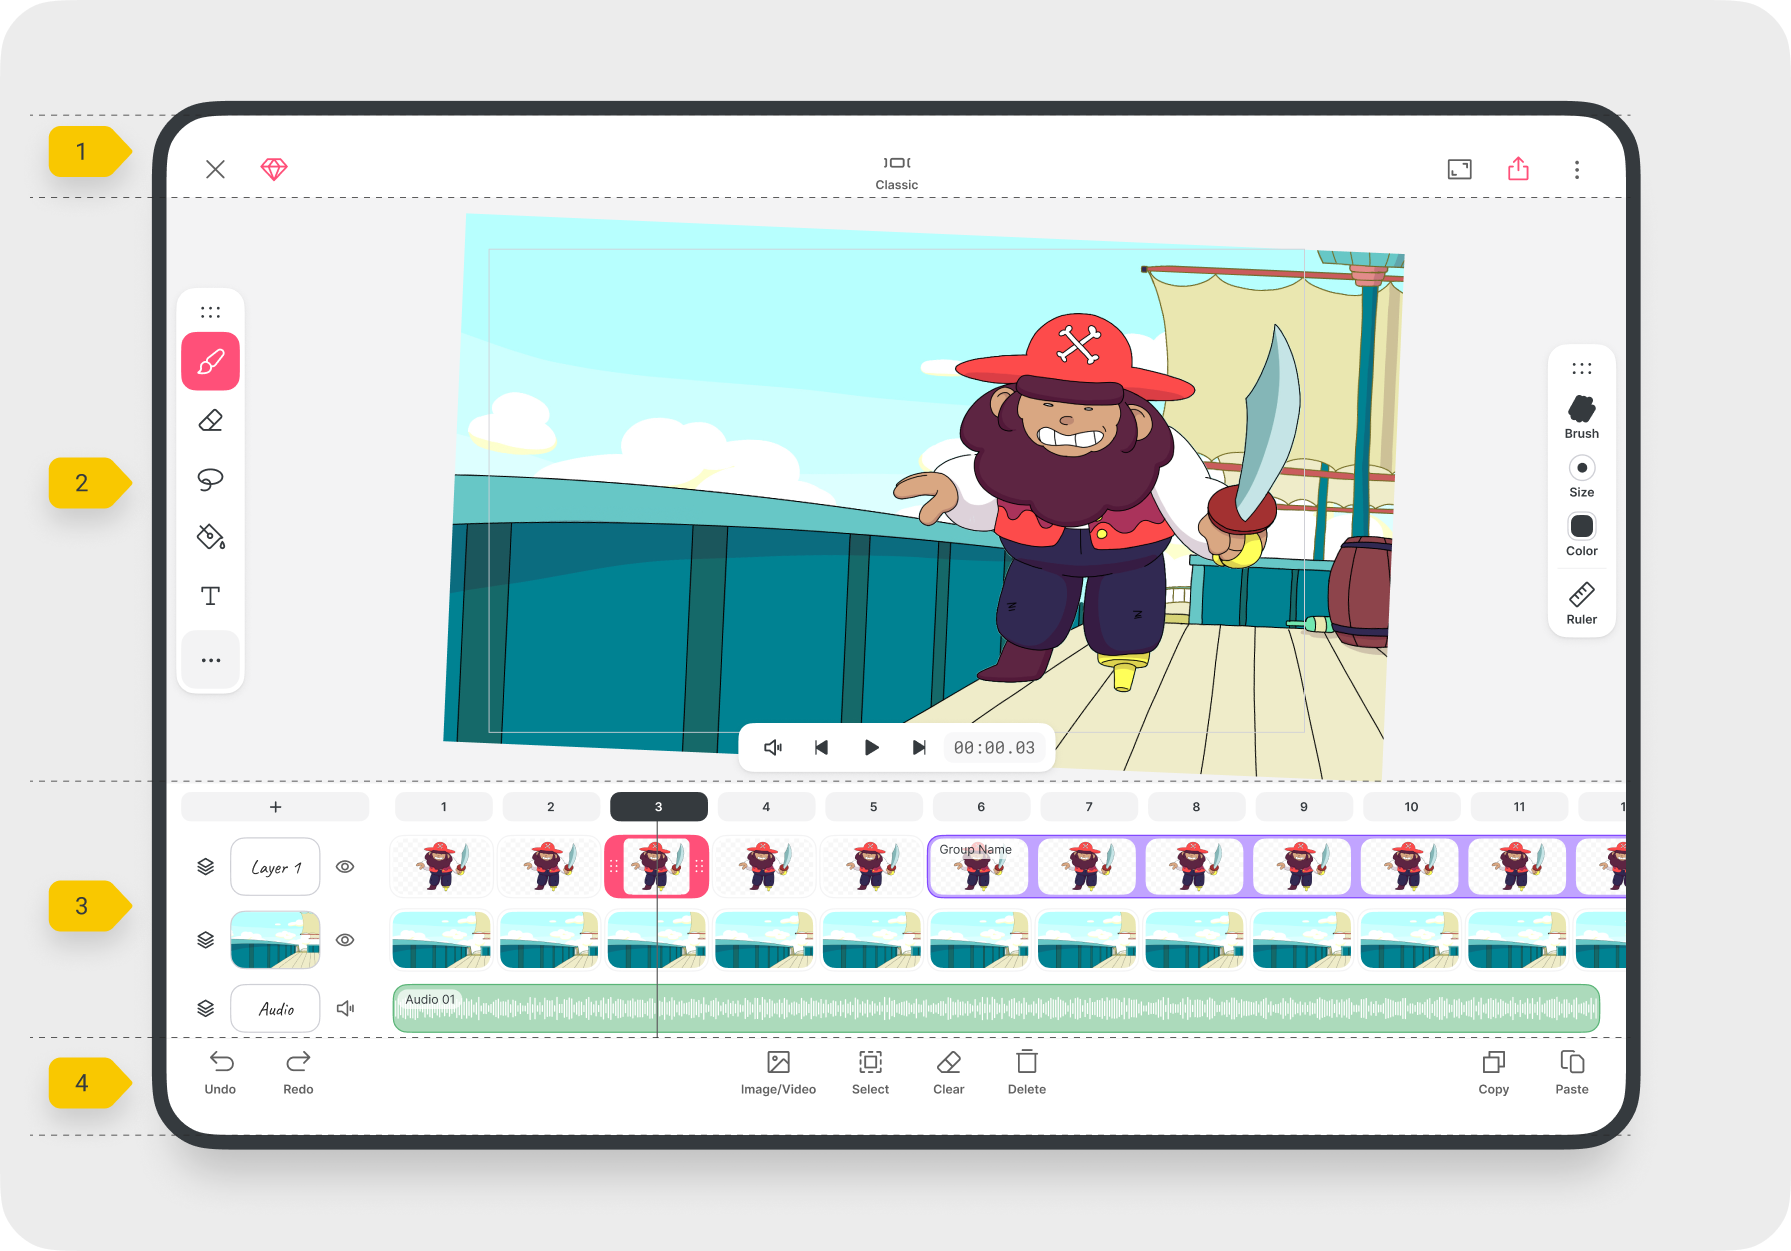
- Navigation bar, the same top controls as Classic.
- Stage, where you draw. It holds the surface, the canvas, and your drawing tools and options, exactly the same as in Classic.
- Timeline, all your layers and audio in one view. Drag it up or down to give the stage or the timeline more room, and at its largest a floating preview shows your animation while you work. The playback controls live here too, along with your layer and audio rows, the frames on each layer, and any groups. Working in the timeline: extend a frame to hold it longer, trim or split a clip or a group, and drag things around to re-time them. Select several frames at once to move, group, or delete them together.
- Context menu, the action bar along the bottom that changes with what you've selected, a frame, a layer, an audio clip, or a whole track. Common actions: import an image or video, copy, paste, clear, delete, and undo or redo.
How to switch layouts
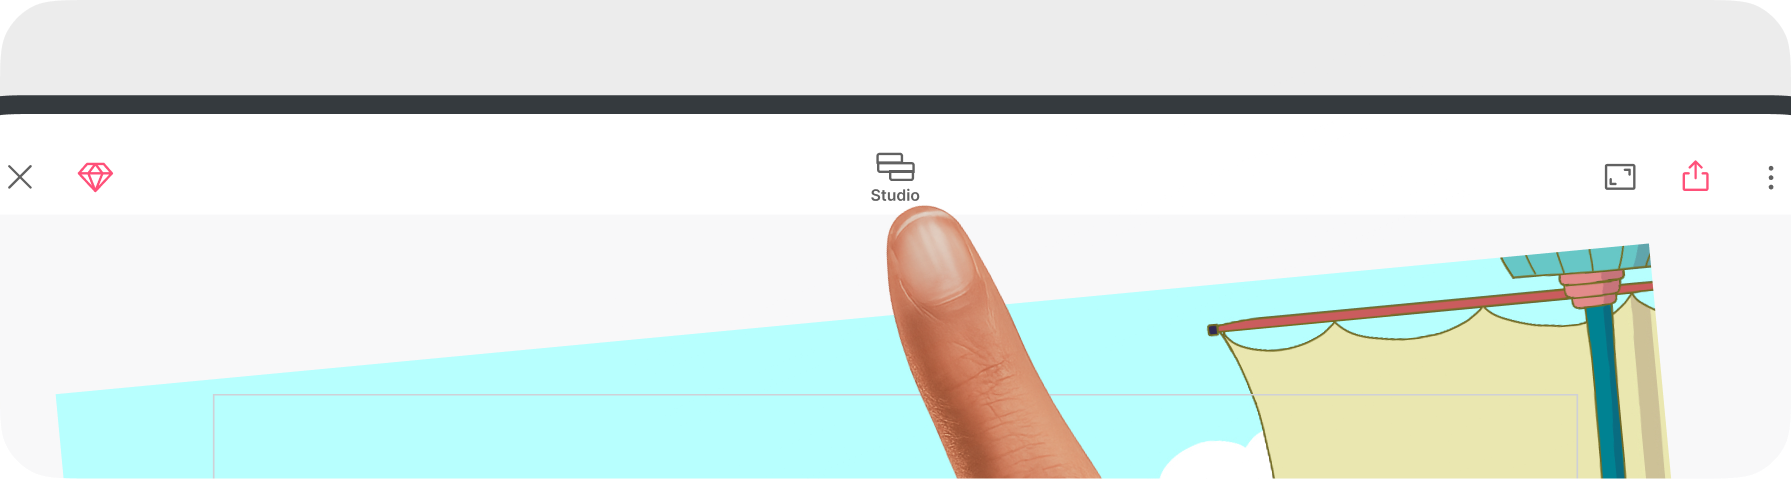
There are two ways to move between Classic and Studio, and your project stays exactly the same either way:
- Tap the layout button in the top bar. It's labeled with the layout you'll switch to: tap Studio to go to Studio, and it then changes to say Classic so you can switch back.
- Drag. In Studio, drag the timeline or the playback controls bar down to drop into Classic. In Classic, drag the Mini timeline up to bring the full timeline back.
Switch as often as you like.
Good to know
- Undo and redo, step back from any change, or redo it if you change your mind.
- Lighter projects, they take up less space on your device.
- All the same features on phone and tablet, nothing is cut out on one or the other.
See it in the app
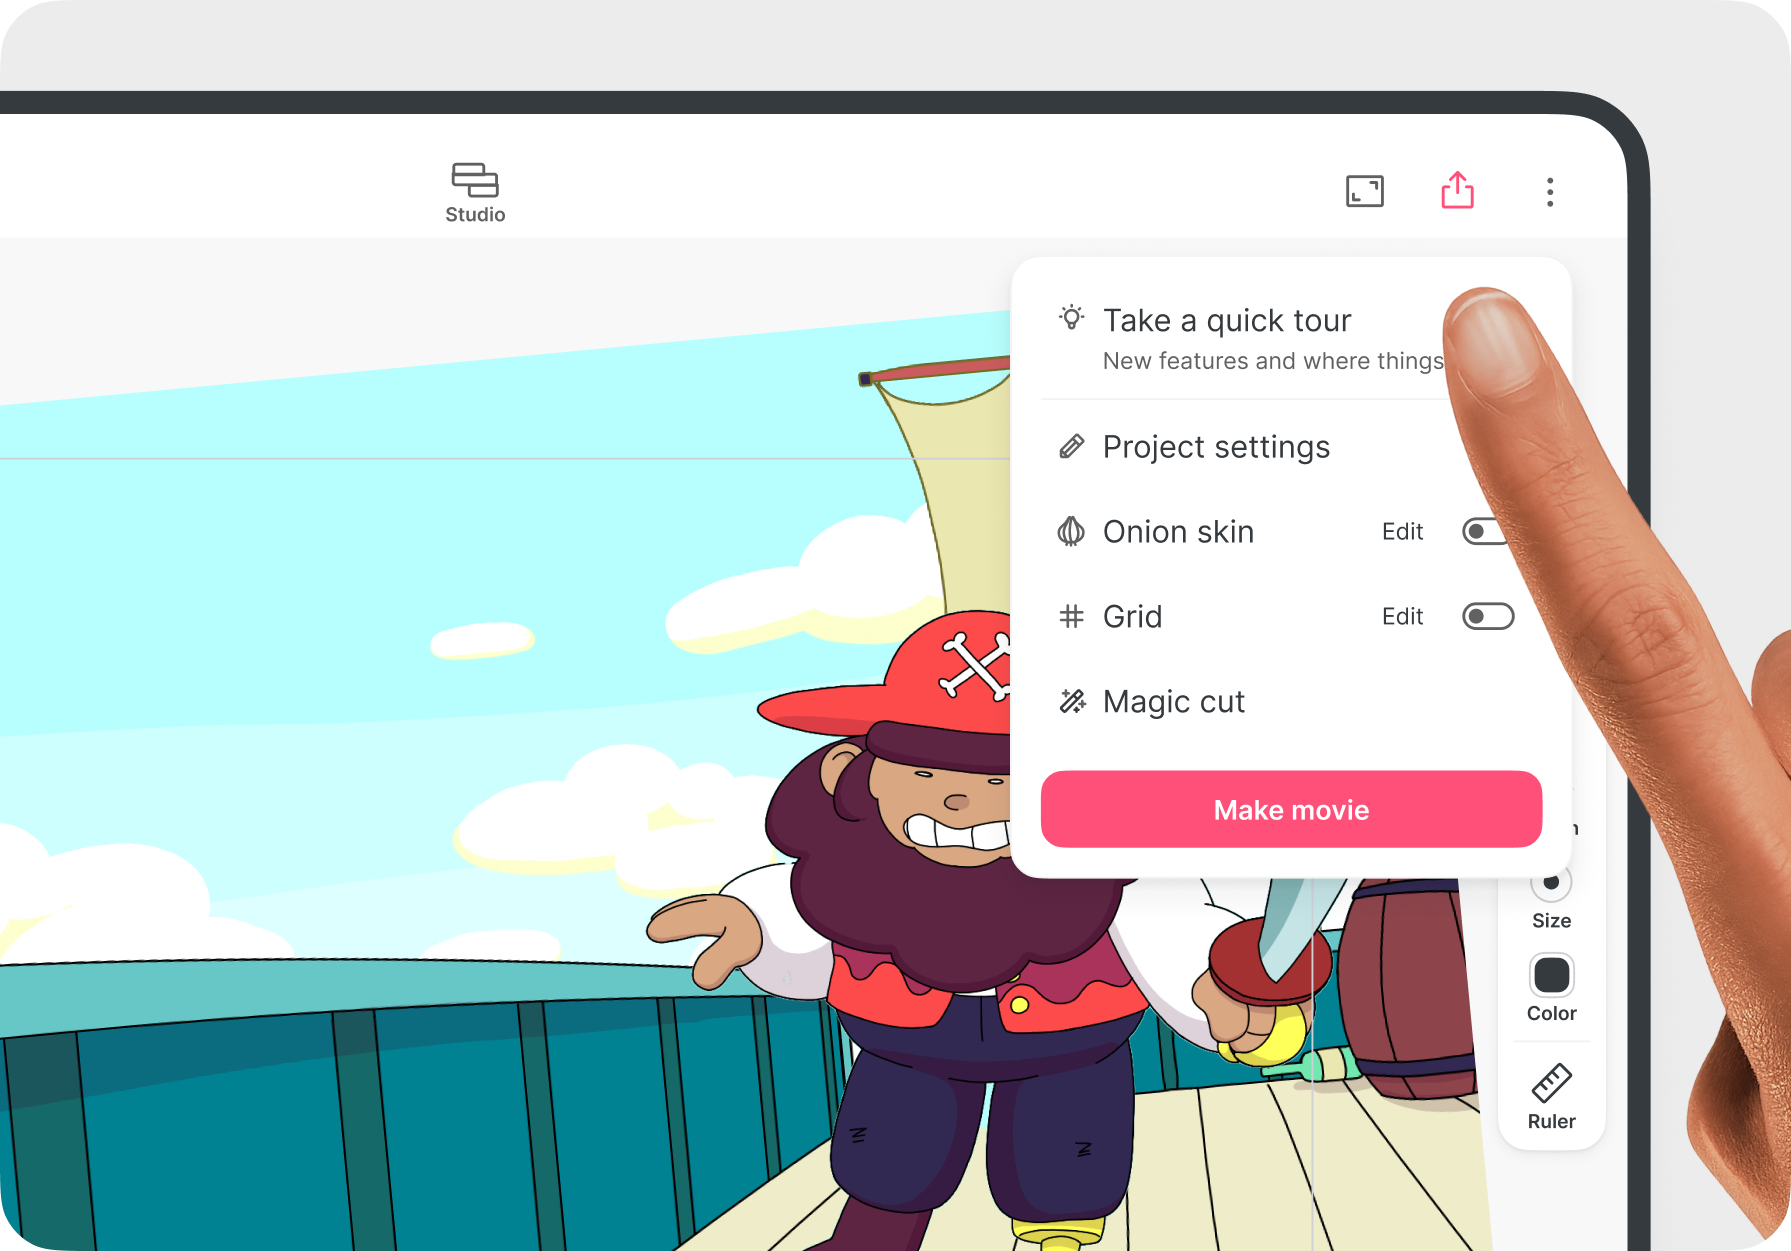
There's a set of short videos showing how things work and where to find them. Open the project menu (the More icon) and tap Take a quick tour to watch.
Coming from a previous version? See what's new and where everything moved.